# Notion Queue
## Configuration Setup
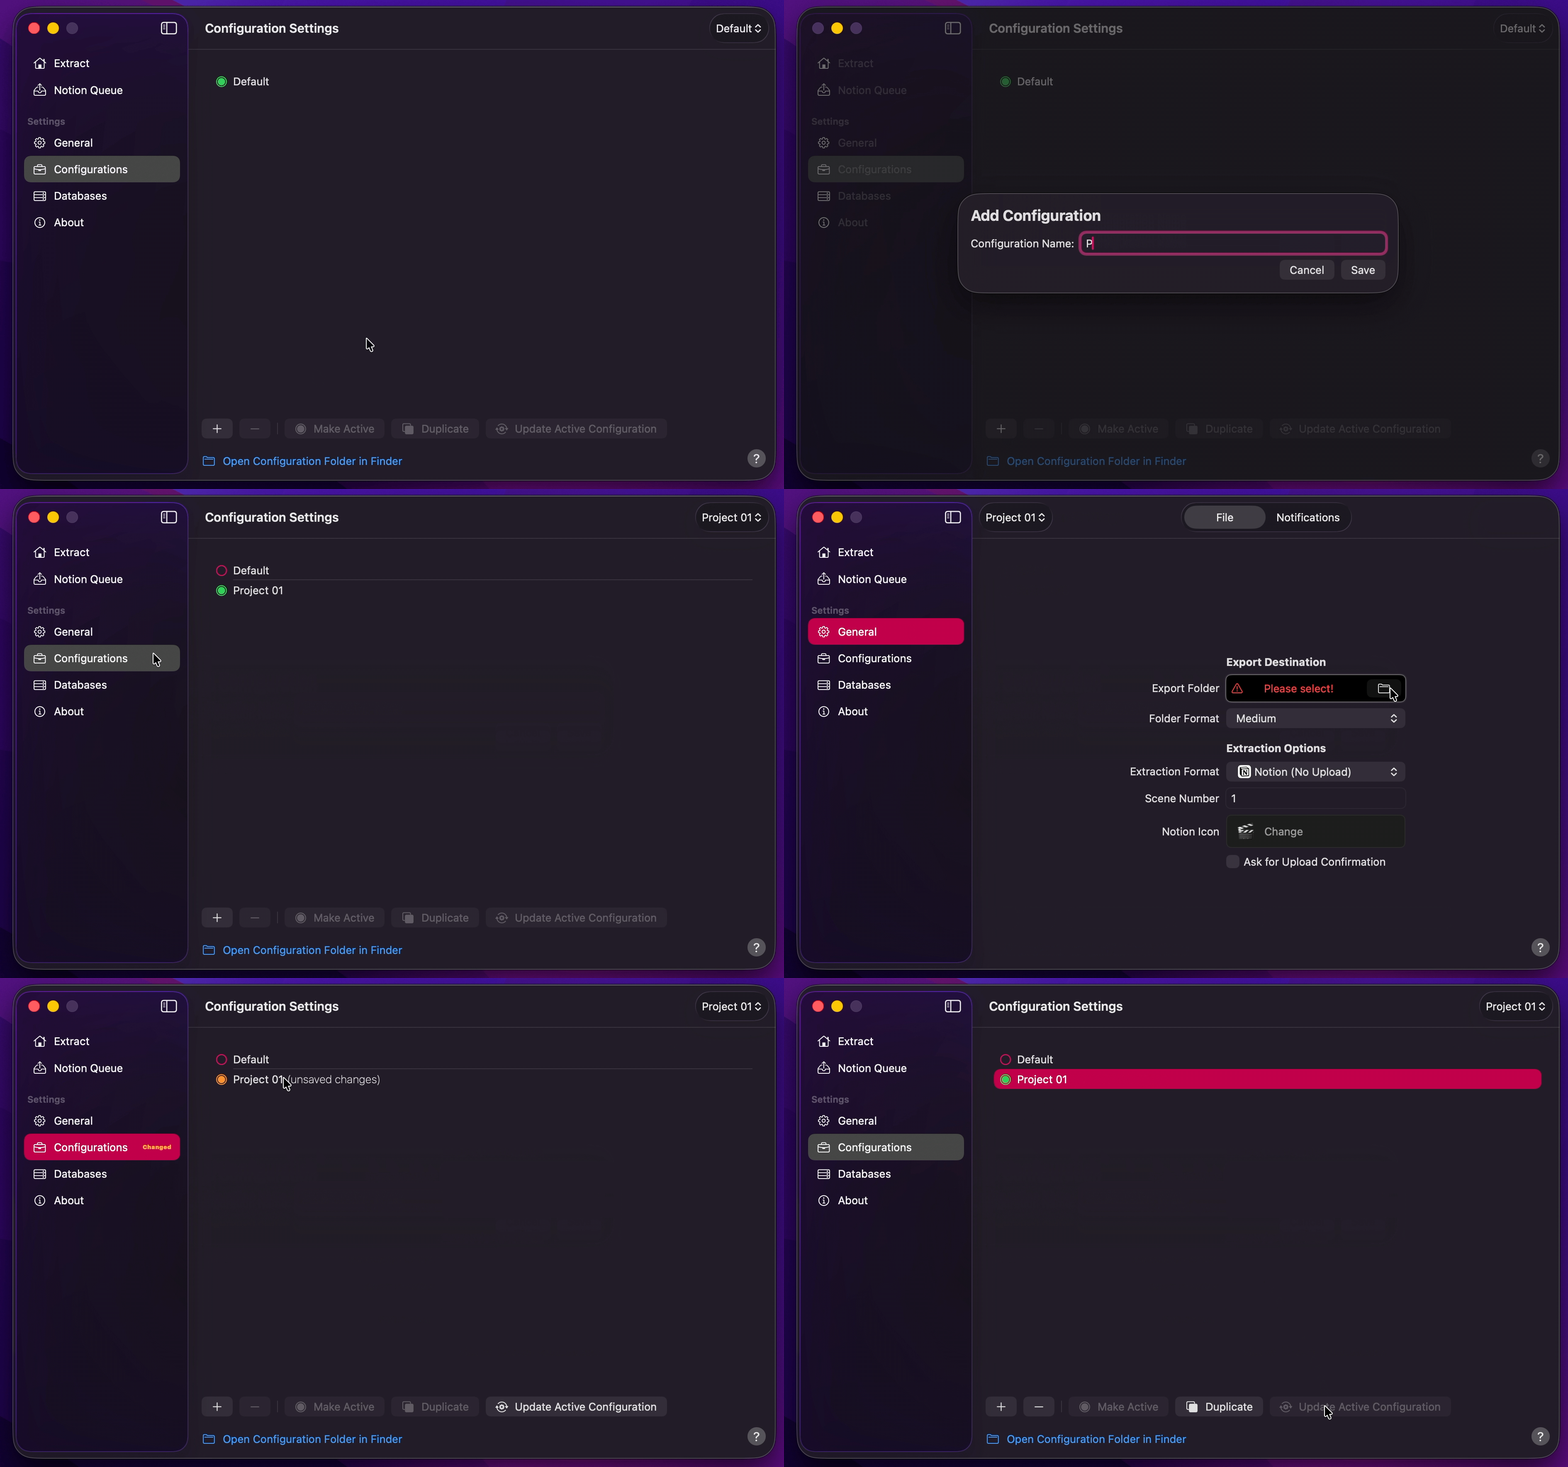
1. [Create Your Configuration](/user-guide/configurations/#add-configuration).
2. Select your desired Export Destination by clicking on the [Folder Icon](/user-guide/general/#export-folder).
3. Duplicate the [Shot Data Notion Template](/user-guide/databases/#notion-template), then create your [Database Profiles](/user-guide/databases). Click `Test Connection` before you save.
4. Under [File](/user-guide/general/#extraction-format), select `Notion (No Upload)` so extracts stay local until you upload from Notion Queue.
5. Set [Scene Number](/user-guide/general/#scene-number) and [Folder Format](/user-guide/general/#folder-format) under [File](/user-guide/general).
6. Return to Configurations to [Update Active Configuration](/user-guide/configurations/#update-active-configuration).
!!!info Info
Your Notion database title (key) column must already be named `Shot ID` and must use Notion’s **Title** property type. **Shot Data** will not create that column for you. You choose a Database Profile as the **Upload Destination** on each Queue row, not as Extraction Format. CSV extracts are local only and do not appear in Notion Queue. To extract and upload in one run, see [Extract a Shot List](/in-action/extract-a-shot-list).
!!!
## Extract First, Upload Later
1. Extract your timelines on [Extract](/user-guide/extract). See [Extract a Shot List](/in-action/extract-a-shot-list).
2. Open [Notion Queue](/user-guide/notion-queue). For each row, choose an Upload Destination.
3. Press `Start Upload` to begin. Press `Stop` to cancel an upload in progress.
!!!info Info
You can also press `Load from Export Destination` to list shot-list folders already in your Export Folder, or drag specific extraction folders onto Notion Queue. When `Delete Folders After Upload` is enabled, folders that upload successfully are moved to the Trash.
!!!