
Notion Queue
Configuration Setup
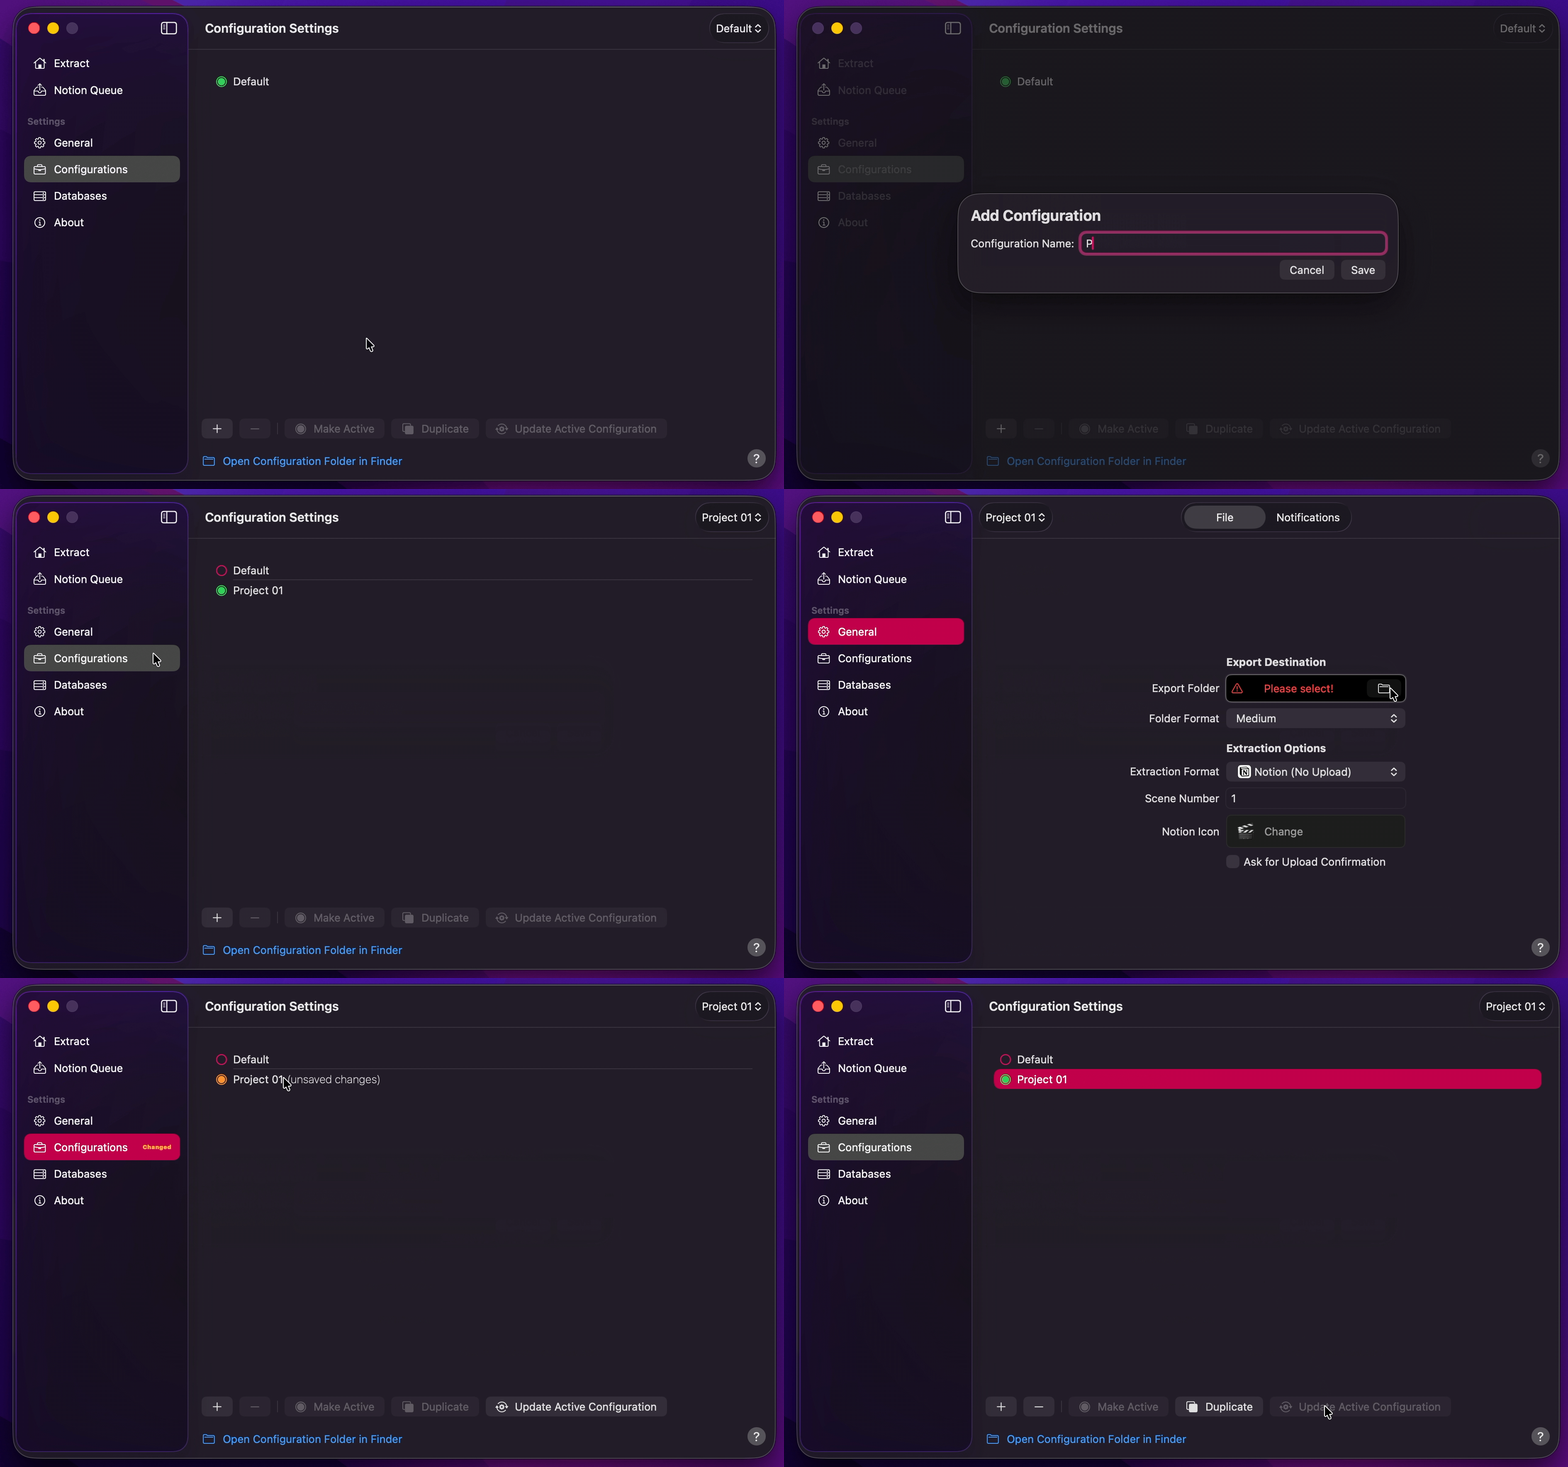
- Create Your Configuration.
- Select your desired Export Destination by clicking on the Folder Icon.
- Duplicate the Shot Data Notion Template, then create your Database Profiles. Click
Test Connectionbefore you save. - Under File, select
Notion (No Upload)so extracts stay local until you upload from Notion Queue. - Set Scene Number and Folder Format under File.
- Return to Configurations to Update Active Configuration.
Info
Your Notion database title (key) column must already be named Shot ID and must use Notion’s Title property type. Shot Data will not create that column for you. You choose a Database Profile as the Upload Destination on each Queue row, not as Extraction Format. CSV extracts are local only and do not appear in Notion Queue. To extract and upload in one run, see Extract a Shot List.
Extract First, Upload Later
- Extract your timelines on Extract. See Extract a Shot List.
- Open Notion Queue. For each row, choose an Upload Destination.
- Press
Start Uploadto begin. PressStopto cancel an upload in progress.
Info
You can also press Load from Export Destination to list shot-list folders already in your Export Folder, or drag specific extraction folders onto Notion Queue. When Delete Folders After Upload is enabled, folders that upload successfully are moved to the Trash.